Set up your organisation
From a fresh installation to your first call through the gateway, priced and recorded. You name the organisation, replace the installation's account with your own, protect it, connect a provider and its prices, bring in a colleague and make a first call. At the end, every later call your organisation makes is governed the same way.
For: the first organisation admin. You need: the Control room's address, the installation's administrator account (from whoever installed Vidai) and an API key for one AI provider your organisation already uses.
1. Sign in and name your organisation
- Open the Control room's address. The sign-in page says "This installation hasn't been set up yet."
- Sign in with the installation's administrator account. You go straight to Set up your administrator account.
- Enter the Organisation name (everyone sees it beside the logo and in every email Vidai sends), Your name, your own Email, then a Password and the same again in Confirm password.
- Choose Complete setup.
You're signed in with your new account and land on Home. Setup has also made the first team, the Org group, with you in it: it's where everyone starts. The installation's account stops working, and setup can't be run again.
Passwords
A password needs at least 12 characters, and Vidai refuses ones that are too common or have appeared in a data breach. A long phrase is easier to remember than a short, complicated word.
2. Protect your account
Your account can change everything, so Home first offers Protect your account.
- Choose Turn on multi-factor sign-in. Your account page opens.
- Scan the QR code with your authenticator app, type the six-digit code it shows and choose Turn on.
- Keep the ten recovery codes somewhere safe. Each signs you in once if you lose your phone, and they're shown only now.
The details: Turn on multi-factor sign-in.
3. Follow Get started
Back on Home, Get started lists what's left, with a count ("Get started: 7 of 8 left"). Each step links to where it's done and is ticked from what's really there.
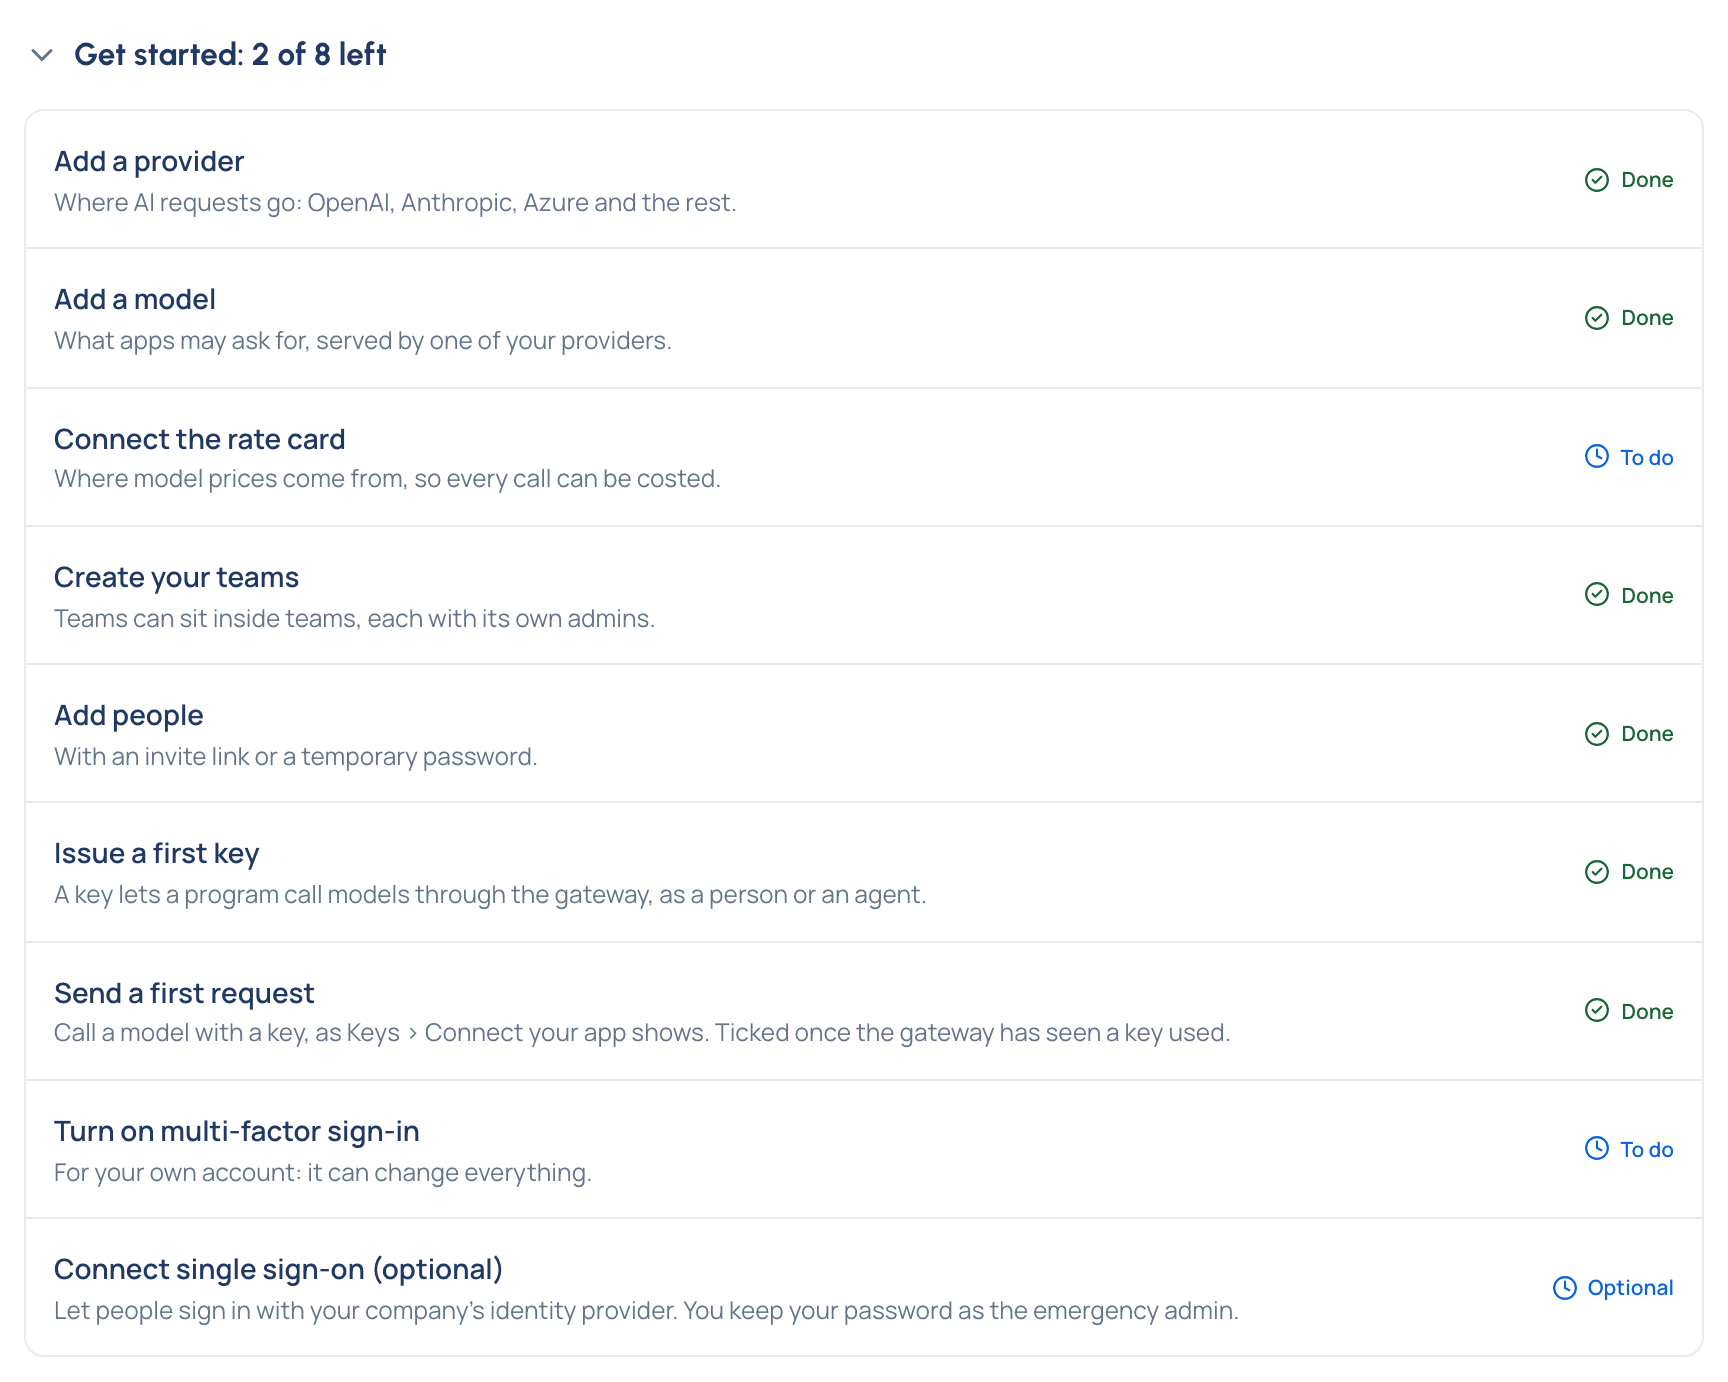
Add a provider and a model
A provider is where AI calls go: OpenAI, Anthropic, Azure OpenAI, AWS Bedrock, Google Vertex AI, Mistral, your own Ollama or vLLM server, and others.
- Open Providers and choose Add provider. Pick yours from the list: Vidai fills in the kind of API, the address and a name.
- Paste the provider's API key and choose Test connection: it asks the provider for its models and says whether it worked, in words. Nothing is saved by a test.
- Leave Find models now ticked and add the provider. New models arrive switched off; in Review the models found, choose Switch on all, or switch on just the ones you want to offer.
Providers that can't list their models (Azure OpenAI deployments, for example) are added on Models by hand. The details: Add a provider and Find a provider's models.
Connect the rate card
The rate card is where model prices come from, so every call is priced at the price in force when it was made.
- Open Settings › Rate card.
- Enter the rate card's address and key, choose Test connection, then Save. A first sync starts.
A model with no price still works: its calls are counted and shown as waiting for a price, never as free. The details: Connect the rate card.
Create a team and invite someone
- Open Teams and choose New team. Name it after a department or client team, for example Creative.
- Open the team's Models tab and choose which models it may call. A new top-level team starts with none, so nothing is reachable until you decide; the Org group starts with every model.
- Open People, choose Add person, enter their name and email, choose Invite link and pick the team.
- Choose Add person, copy the link and give it to them somewhere private. It works once, for 7 days.
With email set up, Send an invite by email sends it for you. The details: Create teams and sub-teams and Invite people.
Issue a first key
- Open Keys and choose Issue a key, for Myself.
- Name it after what will use it ("Laptop tests"), leave the environment on default, and choose Issue key.
- Copy the secret. It's shown only this once; the dialog stays open until you choose Done.
4. Make a first call
Programs reach Vidai through the gateway. Its address is set once, in Settings › Gateway › Address apps use (Set the gateway's address), and from then on everyone sees Connect your app on Keys, with the base URL to copy for each SDK.
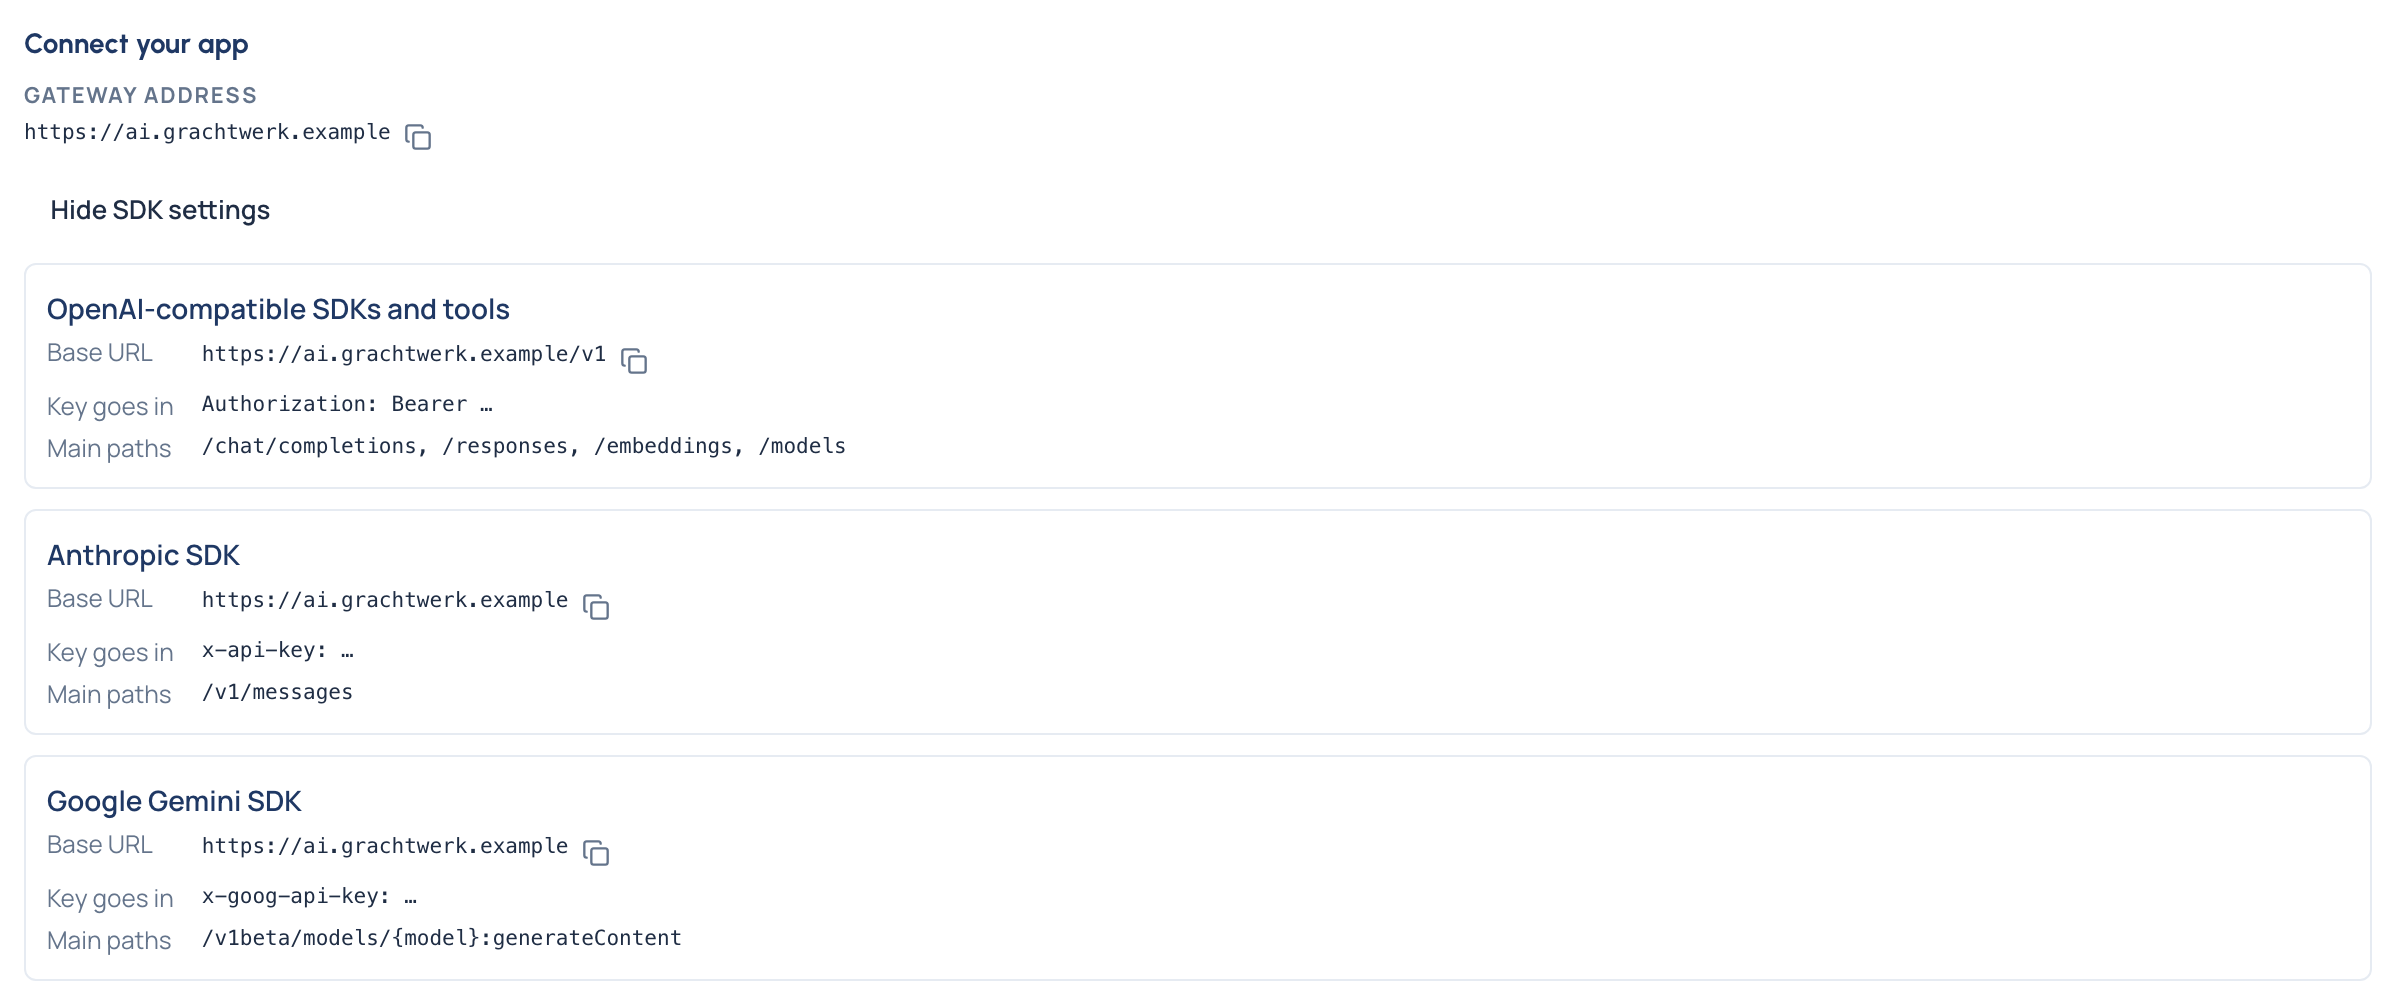
Ask the gateway which models your key may call, then call one:
export VIDAI_KEY="vk_..."          # the secret you just copied
curl https://<your-gateway>/v1/models -H "Authorization: Bearer $VIDAI_KEY"

curl https://<your-gateway>/v1/chat/completions \
  -H "Authorization: Bearer $VIDAI_KEY" \
  -H "Content-Type: application/json" \
  -d '{"model": "<a model from the list>", "messages": [{"role": "user", "content": "Say hello in Dutch."}]}' -i
from openai import OpenAI

client = OpenAI(base_url="https://<your-gateway>/v1", api_key="vk_...")
print([m.id for m in client.models.list()])

reply = client.chat.completions.create(
    model="<a model from the list>",
    messages=[{"role": "user", "content": "Say hello in Dutch."}],
)
print(reply.choices[0].message.content)
The answer carries an x-vidai-request-id header: the gateway's reference for this call.
5. See it in Request logs
Open Request logs. Your call appears within seconds: who made it, with which key, the model asked for
and the model that answered, tokens, how long it took and what it cost. Paste the x-vidai-request-id into Request
reference to find it at once.
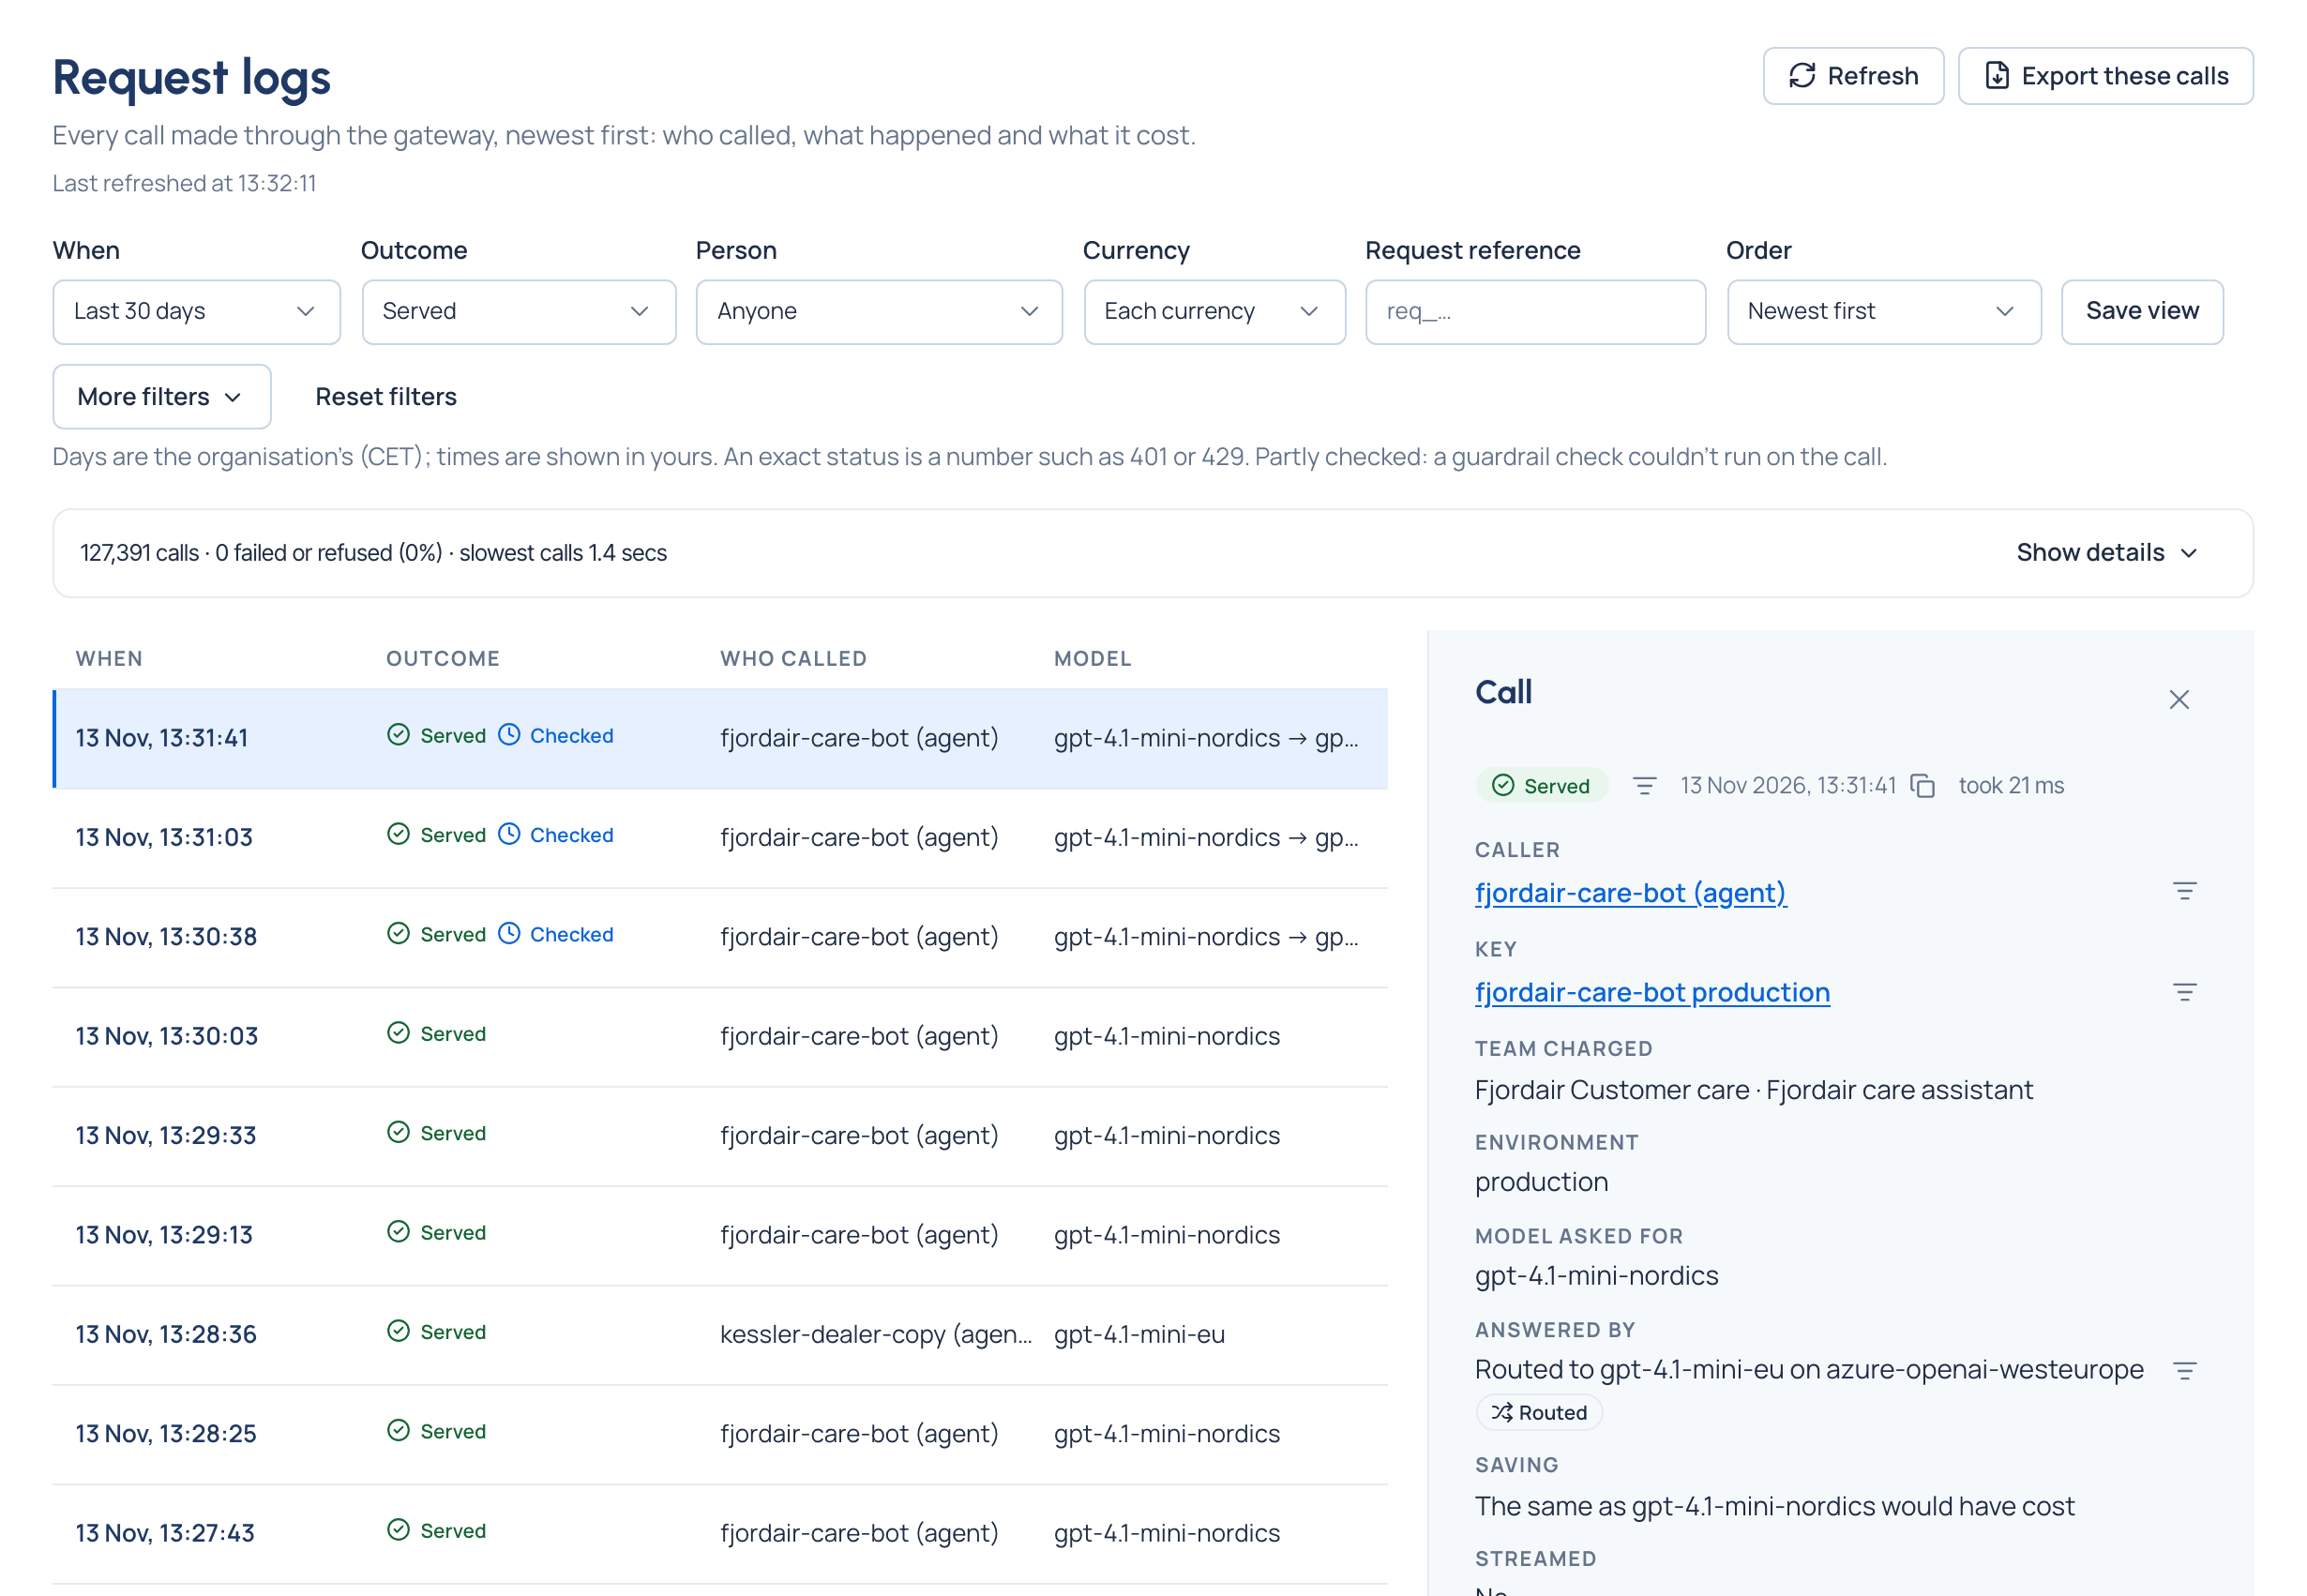
Back on Home, Send a first request is ticked.
What you have now
- One organisation, with you as its admin, protected by a second factor.
- A provider and its models, priced from the rate card.
- A team, a colleague on their way in, and a key.
- A call that went through the gateway, checked against your rules, priced, and recorded.
Where to go next
- Give people their own keys, or let them issue their own: Issue a key.
- Give a program its own identity: Add an agent.
- Keep test and production apart: Create an environment.
- Bring in a second organisation admin, so changes that need a second pair of eyes never wait on you alone: Give someone a role.
- On the Enterprise edition, let people sign in with your identity provider: Connect single sign-on.
- Understand the whole picture: How Vidai works.
Good to know
- Setup creates one administrator account, and it's always a password account. Single sign-on is added afterwards, and you keep your password as the emergency admin.
- Until setup is done, every other address in the Control room brings you back to the setup page.
- Send a first request is ticked once the gateway has seen any key used; it's about a minute behind.