Your first key and request
Your organisation's admin has invited you. In a few minutes you'll have your own key, the models you may call, and a call made and seen with its cost. No provider account, no provider key: Vidai holds those for you.
For: anyone invited to the Control room. You need: your invitation (a link or a temporary password), and an authenticator app on your phone if your organisation asks for multi-factor sign-in.
1. Accept your invitation
- Open the invite link. It greets you by name, says who invited you and to which organisation, and shows the email you'll sign in with.
- Choose a password of at least 12 characters, type it again in Confirm password, and choose Set password and continue. You're in.
Given a temporary password instead? Sign in with it; you're asked to choose your own straight away. Does your organisation use single sign-on? Choose Continue with single sign-on instead. Details: Accept an invitation.
2. Turn on multi-factor sign-in
Home's Get started card asks you to. Choose Turn on multi-factor sign-in, scan the QR code with your authenticator app, type the code and choose Turn on, then keep your recovery codes somewhere safe. If your organisation requires it, the Control room asks you before anything else opens.
3. See what you may call
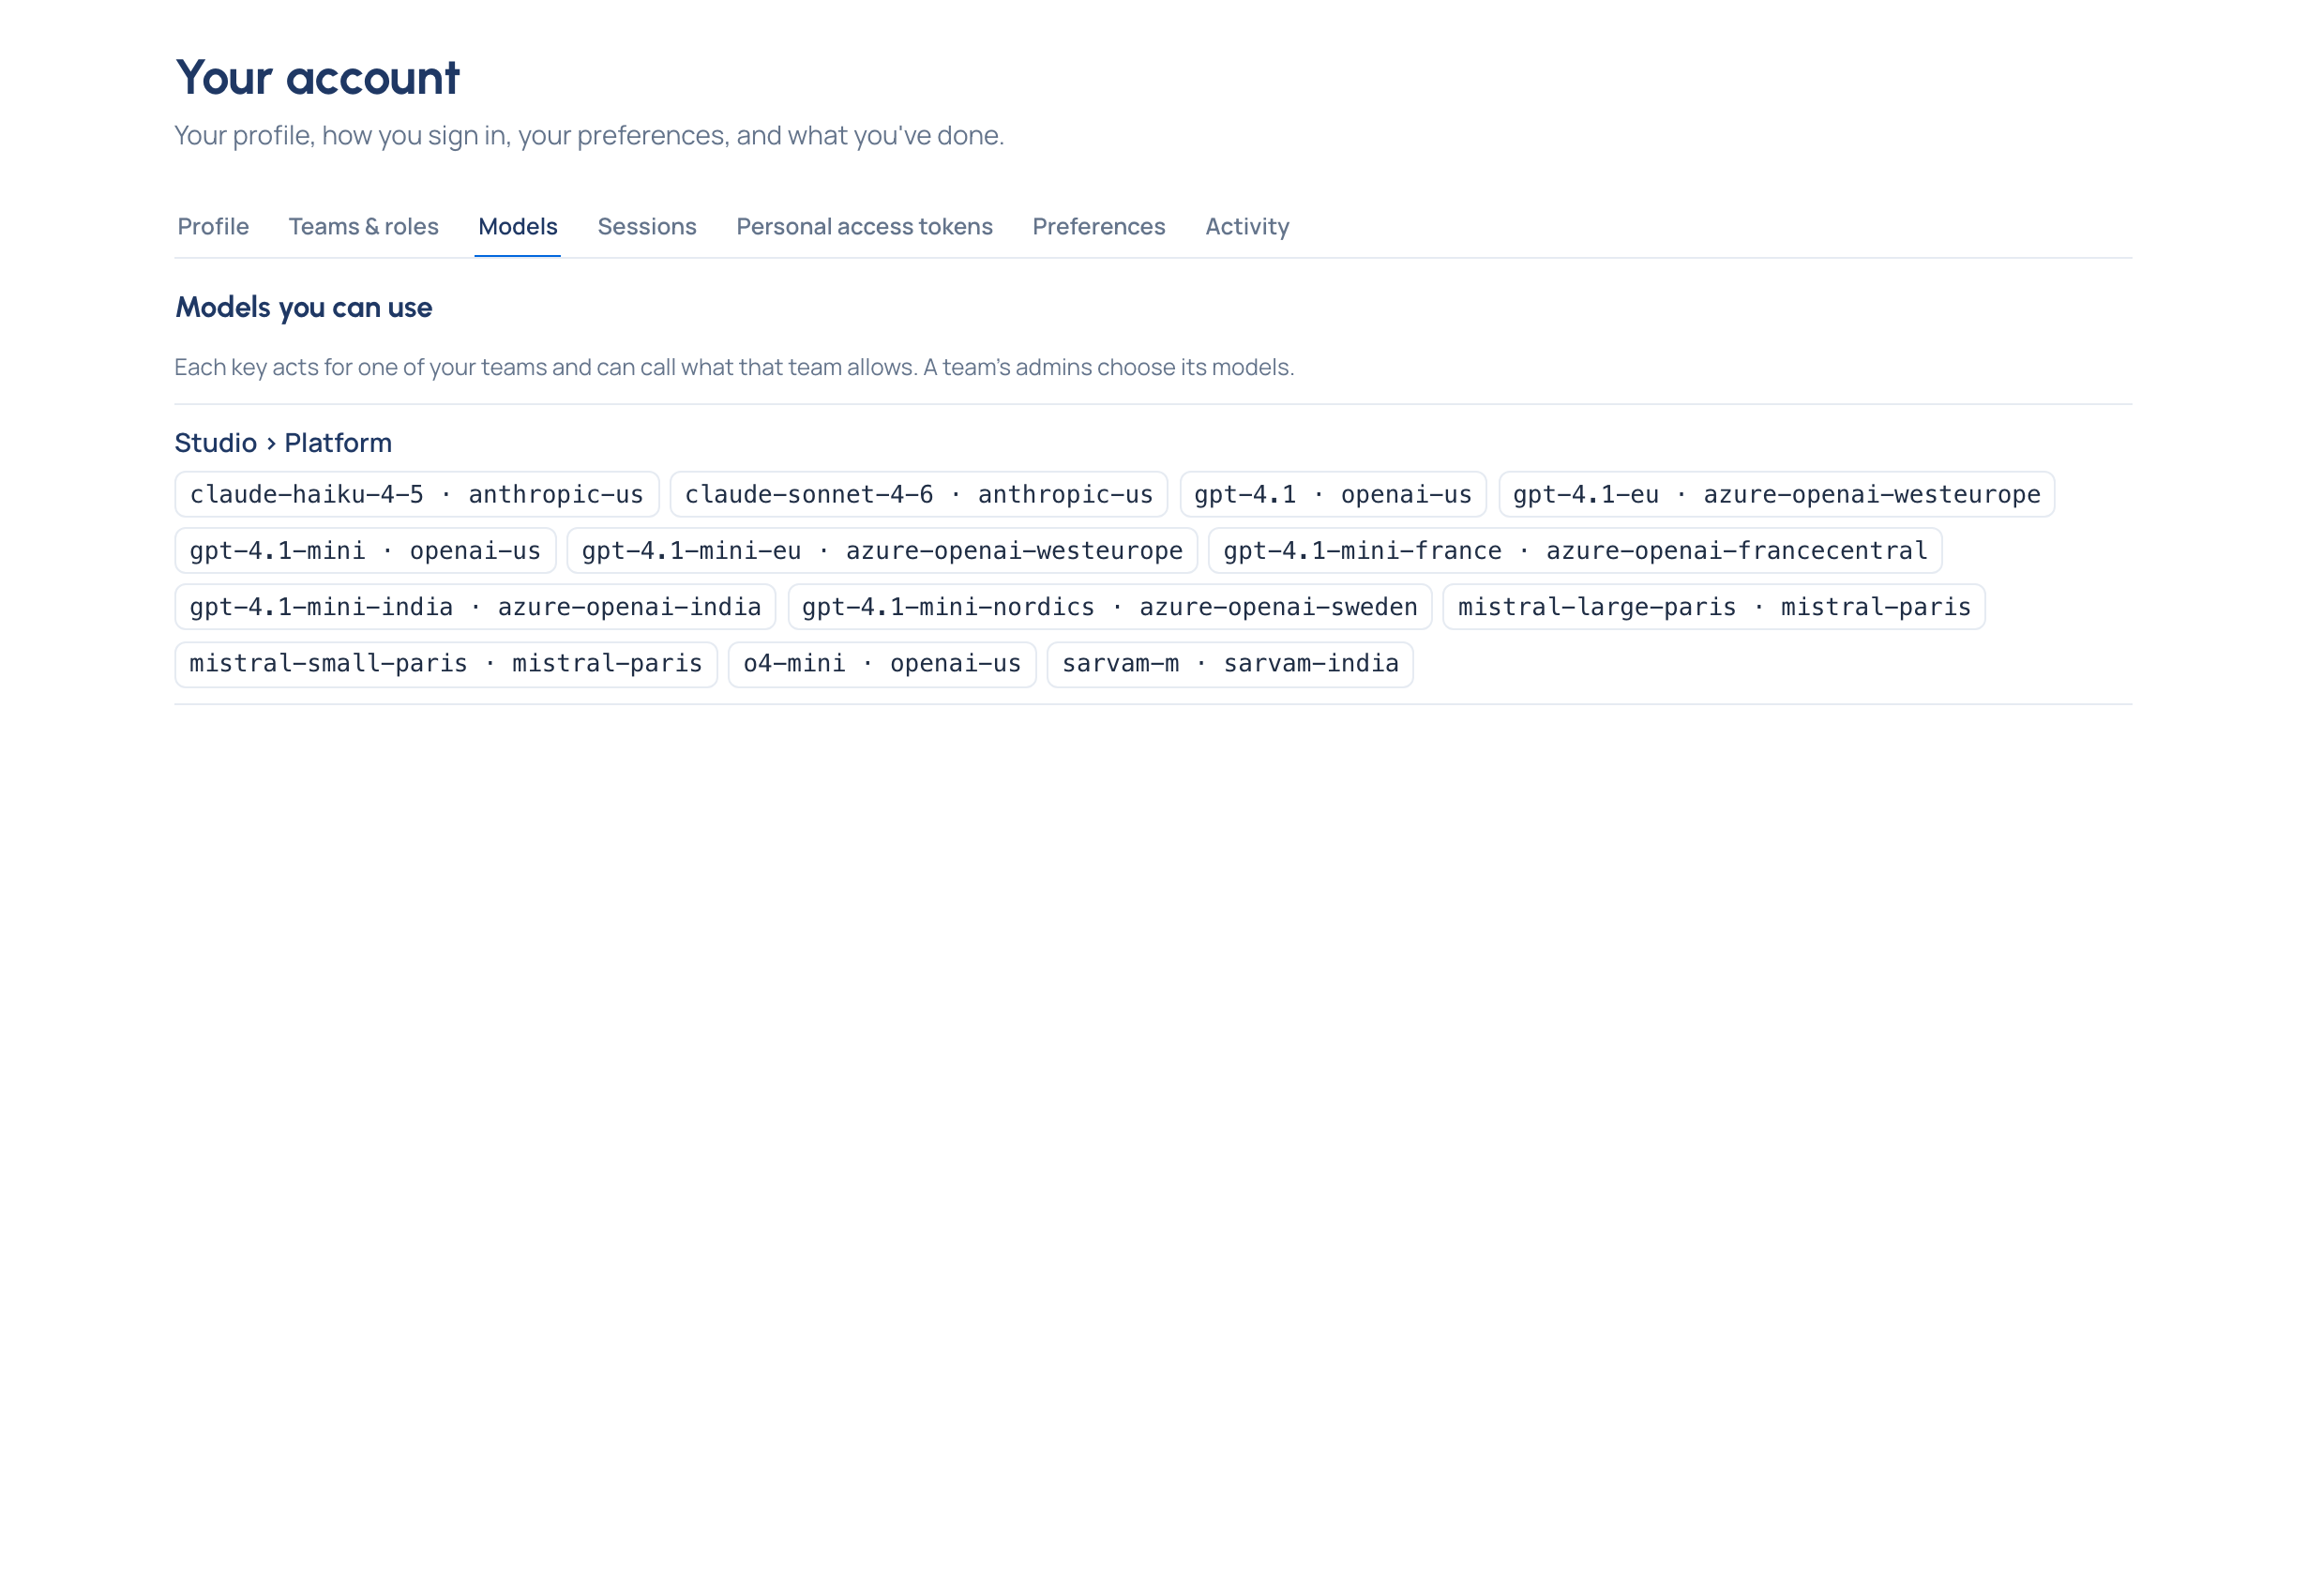
Open the menu under your name and choose Your account, then Models. Models you can use lists, for each of your teams, the models a key acting for that team may call. A team's admins choose them.
4. Issue yourself a key
- Choose Issue yourself a key on Home, or open Keys and choose Issue a key.
- Name it after what will use it: "Laptop", "Notebook experiments".
- If you're in several teams, choose which one it Acts for: that team pays for its calls, and its models apply. With one team, it's chosen for you.
- Keep the default environment.
- Choose Issue key, then copy the secret. It's shown only this once. Choose Done once it's safe.
5. Make a call
Connect your app, at the top of Keys, gives the gateway's address and the settings for each SDK. With the OpenAI SDK in Python:
from openai import OpenAI

client = OpenAI(base_url="https://<your-gateway>/v1", api_key="vk_...")
reply = client.chat.completions.create(
    model="<a model from Your account › Models>",
    messages=[{"role": "user", "content": "Summarise this week's campaign in three bullet points."}],
)
print(reply.choices[0].message.content)
Any tool that lets you set an OpenAI base URL and key works the same way.
6. See it in your usage
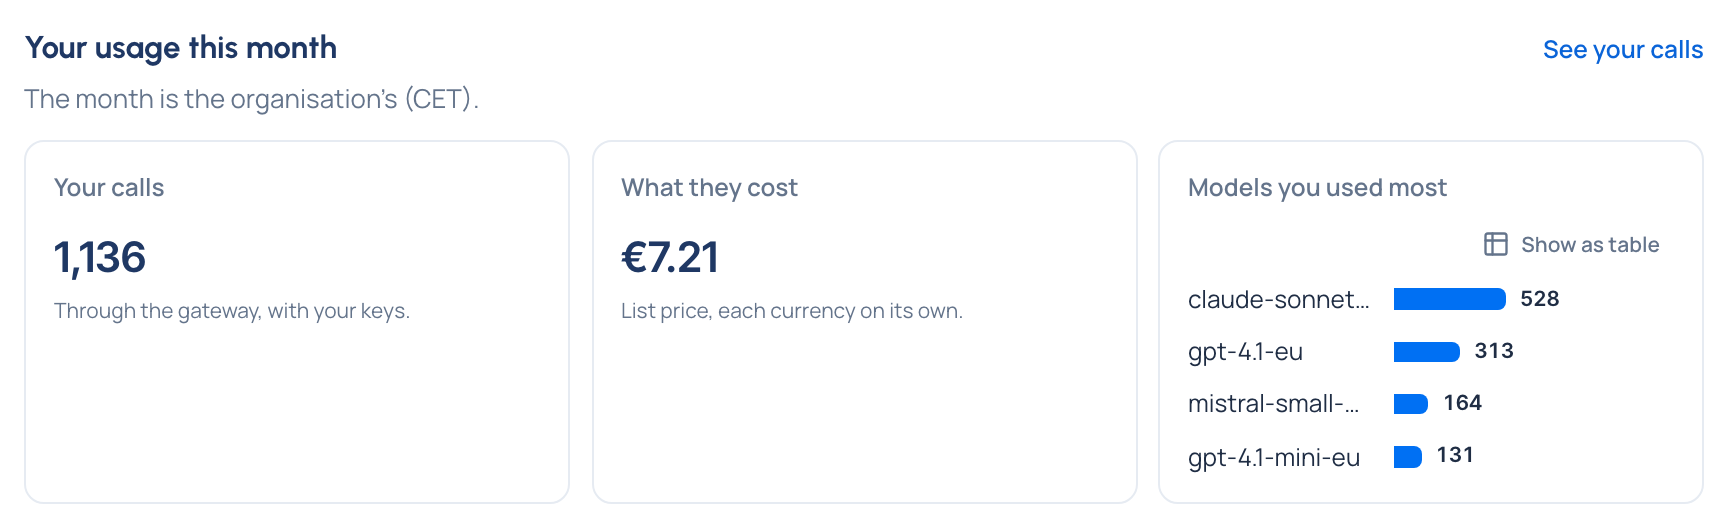
- Home › Your usage this month shows your calls through the gateway, what they cost and the models you used most. Choose See your calls to open them.
- Request logs lists every call made with your keys: the model asked for and the one that answered, tokens, time and cost. A call appears within seconds of being made.
On Home, Send a first request is now ticked.
If something isn't right
- "This link isn't valid any more." An invite works once, for 7 days. Ask whoever invited you for a new one.
- Your key calls nothing. Your team allows no models yet. Ask one of its group admins; until then the key is issued but marked Calls nothing.
- Your call is refused. Request logs says why, in words: a model your team doesn't allow, a budget reached, a guardrail. Your key's page links to its calls with See this key's calls.
Next
- Rotate a key when you change machines or think it leaked.
- See the models you may call, and why.
- Create a personal access token for scripts that manage things as you.